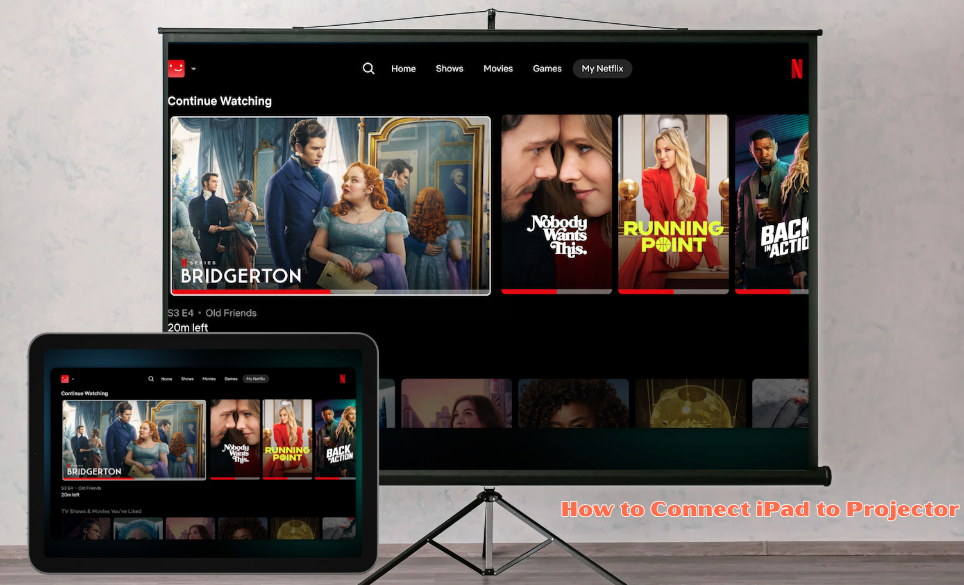
Tired of squeezing around a small screen for movies, slides, or lessons? You can connect your iPad to a projector in just a few simple steps, allowing you to enjoy everything on a much larger display.
This setup works for work, school, or fun, and it only takes the right cable or a wireless option to get started.
You will see how to check your iPad model, pick the right adapter, and choose between wired or wireless methods.
Each approach has its own benefits, and knowing them helps you avoid common issues.
With the right setup, your iPad becomes more than a personal device. It turns into a tool for sharing videos, presentations, and apps with everyone in the room.
Quick Insights 💡:
- Use a Lightning-to-HDMI (or USB-C-to-HDMI) adapter for wired setup
- Use AirPlay with Apple TV or an AirPlay-compatible projector
- Try a wireless adapter (Chromecast, Miracast) if supported
- Ensure projector input source matches iPad connection
- Adjust iPad display settings for best results
Also Read: How to Connect External Display to iPad: A Simple Guide
Things to Check Before Connecting iPad to Projector
Before connecting your iPad to a projector, ensure the projector has the correct input port.
Most projectors use HDMI, some may still have VGA, and newer models may support USB-C. Knowing the available port helps you choose the correct cable or adapter.
Check your iPad model to see if it has a Lightning port or a USB-C port. Older iPads usually use Lightning, while newer models use USB-C.
This detail decides which adapter you need to connect correctly.
If you want to connect wirelessly, ensure that both your iPad and projector are connected to the same Wi-Fi network.
Some projectors support AirPlay or have built-in wireless capabilities, while others may require an Apple TV or a similar device.
Make sure the projector can handle the resolution your iPad sends. Most projectors support standard HD, but if you use a higher resolution iPad, check if the projector can display it without issues.
You can use a quick checklist:
- Projector ports: HDMI, VGA, or USB-C
- iPad port: Lightning or USB-C
- Wi-Fi access: Needed for wireless connection
- Resolution support: Match iPad output with projector capability
Taking a moment to confirm these points saves time and prevents connection problems.
Also Read: How to AirPlay from Mac to TV: Easy Setup Tutorial
Wired Methods to Connect iPad to Projector
You can connect your iPad to a projector using either HDMI or VGA. HDMI is best suited for most modern projectors, as it carries both video and audio, whereas VGA is useful only for older projectors that do not support HDMI.
Method 1 – HDMI Connection (Recommended)
HDMI gives you the best picture and sound quality. Most projectors today support HDMI, making it the easiest and most reliable choice.
If your iPad has a Lightning port, you need the Apple Lightning to Digital AV Adapter. If your iPad has a USB-C port, you need a USB-C to HDMI adapter. Both adapters allow you to connect directly to an HDMI cable.
Steps to connect:
- Plug the adapter into your iPad.
- Connect one end of an HDMI cable to the adapter.
- Connect the other end of the HDMI cable to the projector’s HDMI port.
- Switch the projector input to HDMI.
Once connected, your iPad screen should appear on the projector. HDMI also carries audio, so you can play sound through the projector’s speakers if available. This method is the most straightforward and supports high-quality video.
Method 2 – VGA Connection (Older Projectors)
Some older projectors only have a VGA port, which sends video only. If you need this option, you must use a Lightning to VGA adapter for Lightning iPads. For USB-C models, a USB-C to VGA adapter is available.
Steps to connect:
- Plug the adapter into your iPad.
- Connect a VGA cable from the adapter to the projector.
- Select the VGA input on the projector.
Because VGA does not carry audio, you must use your iPad’s headphone jack or a separate speaker for sound. Additionally, VGA only supports video in standard resolutions, so the image may not be as sharp as it is with HDMI.
This method is useful only when HDMI is not an option, but it still allows you to display slides, documents, or other visuals on older projectors.
Also Read: 5 Pro Methods to Connect iPad & iPad Pro to External Monitors
Wireless Methods to Connect iPad to Projector
You can connect your iPad to a projector wirelessly by using tools like AirPlay, Apple TV, or casting adapters. These options let you mirror your screen, stream videos, or share presentations as long as both devices stay on the same Wi-Fi network.
Method 3 – AirPlay with Apple TV

Apple TV works as a bridge between your iPad and the projector. First, connect the Apple TV to the projector with an HDMI cable. Make sure the projector input is set to the HDMI port you used.
Next, connect your iPad and Apple TV to the same Wi-Fi network. Open Control Center on your iPad, tap Screen Mirroring, and select your Apple TV. Your iPad screen will now appear on the projector.
This method is reliable because Apple TV supports smooth AirPlay streaming. You can use it for slideshows, videos, or apps without extra software. Keep your iPad charged or plugged in to avoid interruptions during longer use.
Method 4 – AirPlay-Compatible Projectors
Some modern projectors come with built-in AirPlay support. With these, you do not need an Apple TV or extra device. Just connect the projector to your Wi-Fi network and make sure your iPad is on the same one.
On your iPad, open Control Center, choose Screen Mirroring, and select the projector name from the list. The iPad display will instantly show on the projector screen.
This setup reduces clutter since you avoid extra hardware. However, check that both your iPad's iOS and the projector firmware are up to date. Updates help prevent connection issues and improve stability during presentations.
Method 5 – Chromecast or Miracast Adapters
If your projector does not support AirPlay, you can use a Chromecast or Miracast adapter. Plug the adapter into the projector's HDMI port and connect it to power if needed. Switch the projector to the correct HDMI input.
From your iPad, you can cast supported apps like YouTube or Netflix directly to Chromecast. For Miracast, you may need a third-party app since iOS does not support it natively.
Key steps:
- Plug the adapter into the projector's HDMI
- Connect the adapter and iPad to the same Wi-Fi
- Use supported apps or casting tools to share content
This method works best when you only need to stream media rather than mirror the entire screen. It is a flexible option if you already own a Chromecast or Miracast device.
Also Read: How Can I Screen Mirror My iPad to a TV?
Choosing the Right Adapter for Your iPad Model
The type of adapter you need depends on whether your iPad uses USB-C or Lightning. Each connector works with different accessories, so using the wrong one can prevent your iPad from connecting to a projector.
Adapters for USB-C iPads (iPad Pro, iPad Air, iPad 10)
Most newer iPads use a USB-C port. This includes the iPad Pro (2018 and later), iPad Air (4th generation and newer), and the 10th-generation iPad. USB-C is more versatile than Lightning and supports faster data transfer and charging.
For a direct connection to a projector, a USB-C to HDMI Adapter is the simplest choice. This lets you plug in an HDMI cable from the adapter to the projector. It works well for presentations, videos, or classroom use.
If you need to keep your iPad charging while connected, use the USB-C Digital AV Multiport Adapter. It has three ports: USB-C for charging, HDMI for video, and USB-A for accessories. This option is more expensive, but it prevents your iPad from running out of power during long sessions.
Some projectors only support VGA. In that case, you can use a USB-C to VGA Adapter, though HDMI is more common and provides better image quality. Always check your projector’s input before buying an adapter.
Adapters for Lightning iPads (Older Models)
Older iPads, such as the iPad 9th generation, iPad mini (5th generation and earlier), and iPad Air (3rd generation and earlier), use the Lightning connector.
These models cannot use USB-C adapters, so you need one designed for Lightning.
The most reliable choice is the Apple Lightning to Digital AV Adapter. It connects to your iPad’s Lightning port and provides an HDMI output for the projector.
It also has a Lightning pass-through port so you can charge your iPad while presenting.
Key points about this adapter:
- Works with HDMI projectors and TVs
- Supports both video and audio output
- Allows charging while in use
- Official Apple accessory, ensuring compatibility
If your projector only has VGA, you need the Apple Lightning to VGA Adapter instead. This adapter supports video but not audio, so you may need external speakers if sound is required.
Always confirm which connector your iPad has before purchasing. Choosing the correct adapter avoids wasted money and ensures a smooth connection.
Troubleshooting: What to Do When Your iPad Won't Connect to the Projector
Connection problems usually come down to either the display not showing up or the sound and video not playing correctly. Checking the right settings and cables often solves the issue quickly.
Fixing a Blank Screen or No Signal Message
If your projector shows a blank screen or "No Signal," start with the basics. Make sure the projector is powered on and set to the correct input source, such as HDMI 1 or HDMI 2.
Next, check all physical connections. Confirm the Lightning or USB-C adapter is firmly plugged into your iPad and that the HDMI cable is secure on both ends. If possible, test with another HDMI cable to rule out damage.
Restart both your iPad and the projector. A simple reboot often refreshes the connection. If the projector still does not detect the signal, try connecting your iPad to another display to see if the adapter works.
Quick checklist:
- Confirm projector input source
- Reseat adapter and HDMI cable
- Try another HDMI cable
- Restart iPad and projector
- Test adapter on another display
Fixing Audio or Video Playback Issues
If video plays but you get no sound, check your iPad’s audio output. Swipe down from the top right corner to open Control Center. In the music widget, tap the AirPlay icon and make sure the projector or connected device is selected for audio output.
Some streaming apps may show errors because of HDCP, which is a copy-protection system. If you see this, use an official Apple adapter, since many third-party adapters do not support HDCP and will block playback.
For choppy video, close unused apps running in the background. This frees up system resources and can improve playback. Also, make sure the HDMI cable is high quality, since older or damaged cables can cause video dropouts.
Troubleshooting tips:
- Select correct audio output in Control Center
- Use official Apple adapters for streaming apps
- Close background apps for smoother playback
- Replace old or low-quality HDMI cables
Pro Tips for a Perfect Presentation
Keep your setup smooth by planning ahead. Small adjustments can make your presentation look more professional and reduce distractions.
Use these tips to stay prepared:
- Charge while presenting: Pick an adapter that has a pass-through charging port. This way your iPad stays powered for the entire session.
- Prevent notifications: Turn on Do Not Disturb mode so texts or alerts do not show up on the projector.
- Check aspect ratio: If the image looks stretched or cut off, adjust the projector zoom or aspect ratio settings until it fits the screen correctly.
Test your projector and iPad connection before the event. A quick run-through helps you confirm sound, brightness, and display quality.
Keep a backup plan ready. Carry an extra cable or adapter in case the main one fails. This saves time and avoids stress during setup.
Place your iPad on a stable surface. Using a stand keeps the screen steady and makes it easier to control slides or videos.
|
Tip |
Why It Helps |
|
Charge while presenting |
Avoids battery loss mid-presentation |
|
Do Not Disturb |
Stops unwanted pop-ups |
|
Aspect ratio check |
Keeps visuals clear and sized right |
By following these steps, you make your presentation run more smoothly and keep the focus on your content.
Conclusion
Mastering how to connect your iPad to a projector opens up a world of possibilities, from professional presentations to immersive home theater experiences.
We have discussed two main options: the reliability of a wired HDMI connection with the correct adapter, and the convenience of a wireless AirPlay setup.
Remember, the key to success is using the right adapter for your specific iPad model and ensuring all devices are properly connected and selected.
👉 Want to protect and enhance your iPad setup? Check out Chesona’s premium cases:
FAQs About How to Connect iPad to Projector
You may run into issues with cables, adapters, or wireless settings when trying to connect your iPad. Connection type also affects sound, video quality, and whether you need extra equipment.
Why is my iPad not connecting to the projector?
Check that your adapter and cable match the projector’s input. Make sure the projector is on the correct input source. Restarting your iPad and reconnecting the cable often fixes detection problems.
How do I mirror my iPad to a projector without Apple TV?
Some projectors support AirPlay directly, letting you connect wirelessly without extra hardware. If your projector does not, you can use third-party wireless display adapters that support screen mirroring.
Is it possible to connect an iPad to a projector using USB?
Most projectors do not accept video input through USB from an iPad. USB ports are usually for service updates or file playback. To display your iPad screen, you need an HDMI or VGA adapter.
Does VGA support audio when connecting iPad to projector?
No, VGA only carries video. If you use a VGA adapter, you must connect a separate audio cable from your iPad’s headphone jack or use external speakers.
Can I use a Bluetooth connection to connect my iPad to a projector?
Projectors generally do not support video over Bluetooth. Bluetooth is mainly for audio devices like speakers or headphones. To share your screen, you need a wired adapter or Wi-Fi–based wireless option.
Are there specific apps required to connect an iPad to a projector?
You do not need special apps for basic screen mirroring. However, some wireless projectors may require their own companion app to work with iOS. Always check the projector’s manual for app requirements.
