The iPad screen timeout setting controls how long your display stays on before it automatically locks. It’s a small feature, but it makes a big difference for battery life, privacy, and convenience.
If your iPad keeps going dark too quickly—or stays on longer than you’d like—you can easily adjust the screen timeout to fit your needs.
In this quick guide, we’ll show you how to change iPad screen timeout settings, explain what each option does, and share simple tips to keep your device running efficiently.
Keep your iPad protected while you fine‑tune your settings. Explore our Heavy Duty iPad Cases for reliable, drop‑resistant protection that keeps your device safe anywhere you go.
What Is iPad Screen Timeout?

The screen timeout setting controls how long your iPad’s display stays on before locking itself. It’s there to help balance battery life, privacy, and convenience by shutting off the screen after a bit of inactivity. You get to decide how long that is.
How Screen Timeout Works on iPad
Screen timeout—Apple calls it Auto-Lock—is just the timer for how long your iPad’s display stays active when you’re not touching it. When the time’s up, the screen dims and locks.
You get preset choices like 30 seconds, 1 minute, 2 minutes, 5 minutes, or Never. If you pick Never, the screen stays on until you lock it yourself. That’s handy for reading or running a presentation, but not great for battery.
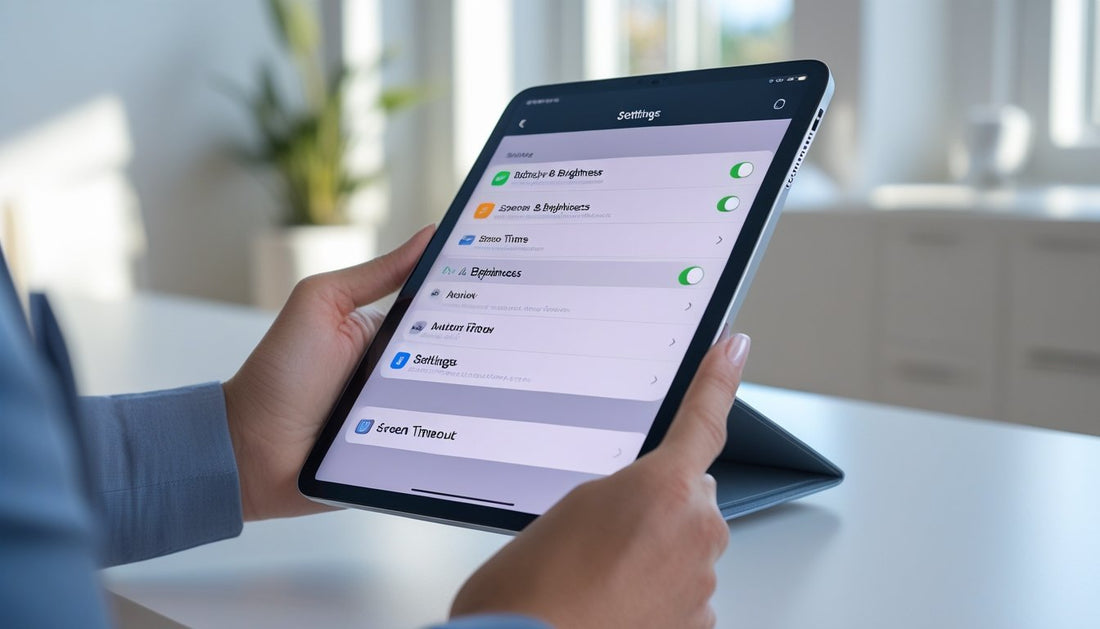
You’ll find this in the Display & Brightness settings. When you change it, the iPad updates the lock timer right away. If the option’s greyed out, Low Power Mode is probably on, which limits timeout to 30 seconds to save juice.
|
Timeout Option |
Screen Stays On For |
Typical Use |
|
30 seconds |
Short |
Battery saving |
|
2 minutes |
Medium |
Everyday use |
|
Never |
Unlimited |
Presentations or demos |
Why Screen Timeout Affects Battery and Security
The display is the biggest battery drain on your iPad. Shorter timeouts save power by shutting the screen off sooner. Longer ones—or Never—will chew through your battery since the screen stays lit, even if you’re not paying attention.
Timeout also helps with security. When your iPad locks itself, it keeps others from poking around your stuff if you leave it behind. That matters if you keep work or personal info on there.
So, you’re always trying to find a sweet spot between saving power and keeping your data safe. Shorter timeouts mean more security and less battery drain, but longer ones are just easier when you don’t want the screen to keep shutting off.
How to Change iPad Screen Timeout Settings
Changing how long your iPad’s screen stays on before locking is an easy way to save battery, bump up privacy, and keep things convenient for reading, watching, or working.
Step‑By‑Step Guide to Adjust Auto‑Lock Time
- Open the Settings app. Tap the gray gear icon on your Home Screen.
- Select “Display & Brightness.” This section covers brightness, appearance, and sleep settings.
- Tap “Auto‑Lock.” This is where you pick how long your screen stays on when you’re not using it.
- Choose a time duration. Usually, you’ll see options like 30 seconds, 1 minute, 2 minutes, 5 minutes, 10 minutes, and 15 minutes. Or pick Never if you want the screen to stay on until you lock it yourself.
Shorter timeouts are best for battery and security—if you walk away, the screen locks fast. Longer ones are nice for reading, cooking, or giving a presentation.
Once you’ve picked your time, just leave the Settings app. The new setting kicks in right away.
|
Duration |
Best For |
Battery Impact |
|
30 sec–1 min |
Security, battery saving |
Low |
|
2–5 min |
General use |
Moderate |
|
10–15 min |
Reading, presentations |
High |
What to Do if Screen Timeout Settings Are Greyed Out
If you can’t tap Auto‑Lock—it’s greyed out—there’s probably a restriction in place. That usually happens if Screen Time or Mobile Device Management (MDM) is set up.
Head to Settings > Screen Time > Content & Privacy Restrictions and see if there’s a profile blocking display changes. You might need to turn off restrictions for a bit or tweak them to allow auto‑lock changes.
If it’s a school or work iPad, the admin might control display & brightness settings remotely. In that case, you’ll need to reach out to them.
Also, check for any installed profiles in Settings > General > VPN & Device Management. Removing or updating a configuration profile can give you access to auto‑lock settings again.
After making changes, give your iPad a restart to make sure new permissions take effect.
Recommended Timeout Settings for Work, Study, or Entertainment
The “right” screen timeout really depends on what you’re doing. For work or study, 2–5 minutes is a solid balance—it keeps the screen on through short breaks but doesn’t waste battery.
For watching movies or drawing, a 10–15 minute timeout keeps the screen from going dark mid-session. Some apps, like video players, ignore auto‑lock anyway, so you might not need to set it super long.
In public or shared spaces, a shorter auto‑lock (30 seconds to 1 minute) locks things up quick if you step away. You can always jump into Display & Brightness > Auto‑Lock and adjust it for whatever you’re up to.
Turn your iPad into a portable workstation. Check out our Portable Keyboards for iPad to type faster, stay productive, and get more done on the go.
Tips to Manage iPad Screen Timeout Efficiently

Managing how long your iPad screen stays on is about finding your own balance between battery, comfort, and not getting interrupted. Tweak Auto‑Lock, Low Power Mode, and brightness to save power but still keep the screen on when you need it—like for reading or a presentation.
Use Auto‑Lock with Low Power Mode
Auto‑Lock sets how long your iPad’s screen stays on when idle. If you set it to something like 2 minutes, you’ll save more battery. When you turn on Low Power Mode, the iPad cuts back on background stuff and might shorten screen timeout even more.
Just go to Settings → Battery → Low Power Mode to turn it on. It’ll also reduce some visual effects and background refresh, so your iPad lasts longer away from a charger.
Honestly, pairing a moderate Auto‑Lock time with Low Power Mode is a lifesaver when you’re traveling or nowhere near an outlet. It keeps things running without you constantly fiddling with settings.
|
Setting |
Recommended Use |
Benefit |
|
Auto‑Lock: 2–5 minutes |
Everyday use |
Balanced power saving |
|
Auto‑Lock: 1 minute |
Low Power Mode |
Maximum battery conservation |
Prevent Screen Timeout During Reading or Presentations
If you’re reading, referencing notes, or giving a talk, the screen dimming every minute is just distracting. Set Auto‑Lock to “Never” for those times. Just remember to switch it back later so you don’t kill your battery for no reason.
Want more control? Try Guided Access under Settings → Accessibility → Guided Access. It locks your iPad to one app and stops the screen from timing out. Super handy for long documents or slideshows.
If you’re in for a long session, plug in your iPad. That way, you don’t have to worry about the battery draining while the screen’s on.
Combine Screen Timeout Settings with Display Brightness for Better Battery Life
Screen brightness matters just as much as timeout. Lowering brightness or using Auto‑Brightness under Settings → Accessibility → Display & Text Size lets your iPad adjust to the light in the room.
If you dim the screen and set a shorter Auto‑Lock, you’ll get a lot more battery life. For example, dropping brightness to 50% and setting Auto‑Lock to 2 minutes can make a noticeable difference without making your iPad hard to use.
Low Power Mode will dim the screen a bit automatically, but you can still tweak it if you need things brighter. Keeping both settings in check helps your iPad last longer between charges.
Upgrade your setup with more connectivity options. Discover our iPad Cases with USB Ports to easily connect accessories, charge devices, and boost your iPad’s versatility.
Conclusion: iPad Screen Timeout
Adjusting your iPad screen timeout is a quick way to make your device more comfortable to use and more efficient. Whether you want to save battery or stop your screen from locking too soon, customizing this setting helps you stay in control.
A few small tweaks can make your iPad feel more responsive to your routine—whether you’re working, studying, or streaming.
For another simple iPad tip, check out our guide on how to turn off the ringer on iPad and learn how to manage your device’s sound settings with ease.
Frequently Asked Questions
You can decide how long your iPad screen stays on, stop it from turning off too fast, and manage screen time limits in the Display & Brightness and Screen Time settings. These controls help you find your own balance between convenience, battery life, and focus.
How do I make my iPad screen stay on longer?
Open Settings, go to Display & Brightness, then tap Auto-Lock. Pick a longer time like 5 or 10 minutes, or choose Never if you want the screen to stay on until you lock it yourself.
How do I stop my iPad screen from turning off by itself?
Head to Settings > Display & Brightness > Auto-Lock and pick a longer duration or Never. If you can’t change it, check Screen Time under Content & Privacy Restrictions since those can lock display settings.
How do I change the screen time limit on my iPad?
Go to Settings and tap Screen Time. From there, pick App Limits or Downtime to adjust how long you can use apps or set up when the device restricts access. Super useful for managing daily use, especially for kids or shared iPads.
Why does my iPad keep going to sleep so fast?
Chances are, your Auto-Lock setting is just set way too short—maybe 30 seconds or a minute. You can bump that up in Display & Brightness. Sometimes, low power mode or Screen Time limits make the screen dim or lock faster, either to save battery or keep you from using it too long. Worth a quick check, right?

