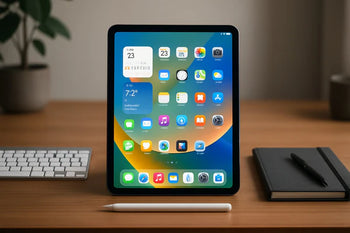


Learning how to set up Gmail on iPad is essential for staying connected and managing your emails on the go. Whether you’re new to the iPad or switching from another device, setting up your Gmail account is quick and straightforward.
In this step-by-step guide, we’ll walk you through the easiest ways to add Gmail to your iPad, using both the built-in Mail app and the official Gmail app. With our tips, you’ll be checking and organizing your emails effortlessly in no time.
Let’s get started and make your iPad email-ready!
Protect your iPad from drops and bumps with our rugged Heavy Duty iPad Case collection.
Preparing to Set Up Gmail on Your iPad

Your iPad needs an internet connection and a compatible iOS version to work with Gmail. Make sure you have your Gmail login info handy before you start.
Checking iPad Compatibility and iOS Version
Gmail works on most iPads that run iOS 14 or later. Having the latest iOS version helps everything run smoother.
To check your iOS, open Settings on your iPad. Tap General, then Software Update.
If there’s an update, tap Download and Install. Your iPad might restart during this process.
Make sure you’re on a stable internet connection before updating. Wi-Fi is usually best, but cellular works too.
Older iPads from 2014 or earlier may not support the latest iOS. You can still get to Gmail using Safari if needed.
Try to keep at least 1GB of free storage on your iPad. That way, emails and app updates don’t run into space issues.
Gathering Your Gmail Account Information
You’ll need your full Gmail account details to start. That means your email address and current password.
Write your Gmail address exactly—don’t forget the stuff after the @, like gmail.com or any custom domain.
Double-check your Gmail password. It’s smart to test it by logging into Gmail on another device first.
If you use two-step verification, you might need an app password. You can find this in your Google Account security settings.
Keep your phone close if you have two-step verification turned on. You might get a prompt to confirm it’s you.
It’s worth testing your internet connection before starting. Open Safari and try loading a site—just to be sure.
Step-by-Step Guide to Adding Gmail on iPad
You can use either the Mail app or the Gmail app. Both take just a few minutes, and you’ll be checking emails in no time.
Using the Built-in Mail App
The Mail app is already on your iPad and handles Gmail well. It’ll sync your emails, contacts, and calendar events automatically.
Step 1: Open the Settings app.
Step 2: Scroll down and tap Mail.
Step 3: Tap Accounts.
Step 4: Tap Add Account.
Step 5: Choose Google from the list.
Step 6: Enter your Gmail address and password. Follow the prompts to finish up.
Step 7: Pick what you want to sync—Mail, Contacts, Calendars, Notes.
Step 8: Tap Save.
Your Gmail account should now show up in the Mail app. Open Mail and tap the mailbox icon to see your folders.
Setting Up Gmail via the Gmail App
The Gmail app gives you more features. You get things like Smart Compose, Chat, and Spaces.
Step 1: Download Gmail from the App Store.
Step 2: Open the app once it’s installed.
Step 3: Tap Sign in and type your Google email address.
Step 4: Enter your password and finish any two-factor authentication if it pops up.
Step 5: Allow notifications if you want them.
The Gmail app loads your inbox right away. Tap the three-line menu in the top-left to see labels, spam, and more.
To use Chat and Spaces, tap the menu, go to Settings, then tap Chat and turn it on.
Troubleshooting Common Setup Issues
Sometimes things don’t go as planned. Here are a few common issues and quick fixes.
Authentication Problems: If your password isn’t working, check if you have two-factor authentication. You might need an app-specific password from your Google account settings.
Emails Not Syncing: Go to Settings > Mail > Accounts > Gmail and make sure Mail is on. Check your internet connection too.
Missing Folders: In Mail, tap Mailboxes and find your Gmail account. Tap Edit to show or hide folders.
Notification Issues: Go to Settings > Notifications > Mail and make sure notifications are allowed for Gmail.
If nothing helps, try removing and re-adding your Gmail account on the iPad.
Boost your typing speed and comfort with our sleek Magnetic Keyboards for iPad collection.
Tips for Managing Gmail on Your iPad

You can tweak notifications and sync settings to make Gmail work better for you. Labels and folders help keep things tidy, and some built-in features can really boost your productivity.
Customizing Notifications and Sync Settings
Open the Settings app to control Gmail notifications. Tap "Notifications" and find Mail to adjust alerts.
Turn off sounds for less important emails. You can even set different alert styles for work and personal accounts.
For sync, go to Settings > Passwords & Accounts. Tap Gmail to change how often emails download.
Pick "Push" for instant emails, or "Fetch" if you want to save battery. You can set fetch times from every 15 minutes to manual.
Two-factor authentication adds security but might require an app password. If sync stops, check your Google account settings.
Turn off notifications for promos by creating filters in Gmail’s web version. These settings sync to your iPad automatically.
Organizing Emails with Labels and Folders
Gmail uses labels, but on your iPad, they look like folders. Create labels in Gmail’s web version to keep things organized.
Common labels are:
- Work
- Personal
- Bills
- Travel
- Shopping
Mail shows Gmail labels as folders in the sidebar. Tap and hold an email to move it quickly.
Use the search bar to find emails by label. Try typing "label:work" to see only work emails.
Set up filters in Gmail’s web settings to auto-label emails. For example, emails from your boss can go straight to "Priority."
Each Gmail account keeps its own labels, which is helpful if you use both personal and work accounts.
Archive emails instead of deleting them. That way, you can find them later but keep your inbox clean.
Using Gmail Features for Productivity on iPad
The Gmail app has more features than the basic Mail app. Download it for the best Gmail experience.
Smart Reply suggests quick responses. Tap one to reply fast without typing.
Use Snooze to hide emails until you actually need them. Snooze bills or reminders until the right time.
The Undo Send feature gives you about 30 seconds to stop an email after you hit send. Turn it on in Gmail settings.
Google Apps like Drive and Calendar link right into Gmail. Tap attachments to open files in the right app.
Set up Canned Responses in Gmail’s web version for emails you send a lot. They’ll work in the Gmail app too.
You can use split-screen to read emails while working in another app. It’s handy for copying info between Google Apps.
Multiple Gmail accounts can share Google Drive files. Switch accounts in the Gmail app to see different files.
Keep your device clean and stylish iPad cases from our Stain Resistant iPad Case collection.
Conclusion: How to Set Up Gmail on iPad
Setting up Gmail on your iPad is a simple way to stay connected and manage your emails efficiently. Whether you use the built-in Mail app or the Gmail app, following the right steps ensures smooth syncing and easy access to your inbox.
With your Gmail account ready, you can focus on productivity without missing important messages. Want to explore more tools to boost your workflow? Check out our guide on iPad Apps for Business Owners in 2025 to discover the best apps for your needs.
Frequently Asked Questions: How to Set Up Gmail on iPad
Why is my Gmail not working on my iPad?
Gmail issues on your iPad often stem from network problems or incorrect login details. First, check your internet connection and verify that your email and password are correct. If the problem persists, you might need to remove and then re-add your Gmail account to your iPad, or even try reinstalling the Gmail app itself.
How to configure email settings on iPad?
To configure email settings on your iPad, go to the Settings app and tap on Mail. Here, you can adjust how often your iPad checks for new emails. Under Accounts, you can manage individual email accounts, including syncing mail, contacts, and calendars. You can also set up notifications and customize email signatures within the Mail settings.
How to manage Gmail accounts on iPad?
You can add and manage multiple Gmail accounts on your iPad by simply repeating the account setup process for each one. Once added, you can use Mailboxes within the Mail app to easily switch between your different accounts. To control specific sync settings for each Gmail account, navigate to Settings > Mail > Accounts.
Is Gmail IMAP or POP?
Gmail primarily uses IMAP (Internet Message Access Protocol) by default. This means your emails are synced across all your devices and remain stored on the server. While POP (Post Office Protocol) downloads emails to a single device and often removes them from the server, IMAP is recommended for a seamless and consistent email experience across all your devices, including your iPad.


